
Overview of tools
Contents
Overview of tools#
We will be using the following tools in the course:
Piazza for communication, i.e. Q&A and announcements. You can join the class Piazza by clicking this signup link. See here for formatting help (e.g., you can add code or even format a post in LaTeX!), and feel free to give the developers feedback by emailing team@piazza.com. For project-related teamwork, you can make private posts visible to select people to communicate directly with your project group.
Please use Piazza instead of emailing the instructor or TA(s), as other students will likely share your questions and may be able to answer them too (or edit the question to make it clearer or more complete). While I will be answering questions within a window of 24 hours, I encourage you to help each other and answer each other’s questions.
There are folders in Piazza for each major part of the course, including each problem set, project milestone, and final project component (the final presentation and report share the final_project folder). The other folders and their respective topics for discussion are:
- `enrollment/logistics`: enrolling in the course and other logistics, like the schedule and due dates.
- `pythonhelp_general`: python in general, not specific to problem sets or final project components.
- `datacamp`: DataCamp, esp. about making sure your account is set up.
- `git/github`: creating git repositories, the online GitHub interface, making commits and pull requests, etc.
- `latex/overleaf`: LaTeX syntax, working with templates on Overleaf, etc.
- `miscellaneous`: random stuff, i.e. anything that doesn't fit a problem set, final project component, or the above folders.
Locally-installed Python. While cloud computing is common in data science, the baseline for code development is to work locally. So the main interface we will use to code is your own laptop, on which you will install Python and relevant packages.
Text editor. You will need this when working with code locally to edit
.pyscripts, text files, and.yamlfiles. See instructions below.Git/GitHub for version control. One of the course goals is to get you more familiar with using Git/GitHub for version control. You can interact with GitHub both from your local machine and from the Jhub remote environment. There are instructions below for each, and we’ll have an in-class activity where you create your own repository and add me as a collaborator.
Jhub as a remote computing environment. Jonathan Crossett in Dartmouth’s Information, Technology, and Computing has set up a dedicated course server on Dartmouth’s Jupyter Hub (Jhub for short). This allows you to open up any browser and complete Python tutorials without needing to download data or files locally / deal with package installation issues. You will need a local Python installation for this course, but JHub is an acceptable option for early in the quarter and/or a backup if/when you have sticky local installation errors. More details on the server are below.
Terminal/terminal emulator. This is mainly for interfacing with Git/GitHub. See instructions below for installation.
LaTeX/Overleaf for dynamic typesetting. We’ll be using the LaTeX typesetting software to integrate writing and formulae and more cleanly integrate figures into writeups. We’ll be interacting with LaTeX through an online interface called Overleaf, so please create a free account here. If you want to work with LaTeX offline/locally, try googling “how to install LaTeX”; some popular editors include TeXworks and LaTeXiT.
Locally-installed Python#
Please download Python 3.9+ via the Anaconda distribution system (download it here). 3.8+ is strongly preferred due to compatibility between .pkl files.
Once you’ve installed Python locally, install all the packages listed in the requirements.txt file on GitHub. You can use Anaconda to install the major packages from this list (e.g., scikit-learn); the others you will need to install with pip install from the command line. Package names may vary a little depending on operating system–the version names in requirements.txt are for Linux. If you don’t yet have pip installed locally, here are instructions for installing pip on Mac/OSX and here are instructions for installing pip on Windows. Most of these packages you won’t need until the second half of class, but you’ll likely save yourself some anxiety if you get them all installed in the first week of class.
If working with .py scripts from command line, you can also create a virtual environment and install all the packages within that (via pip3 install -r requirements.txt) to maintain a clean, isolated set of packages for the course. This is best practice for local coding as it reduces the risk of dependency conflicts, but you’ll need to remember to activate the virtual environment whenever you execute code on command line. (Virtual environments don’t usually work when using Jupyter notebooks, especially when launched from Anaconda.)
How to open a Jupyter notebook#
Point and click way:
Go to applications and click on the
Anaconda-Navigatoricon. After a moment, you’ll see the interface below
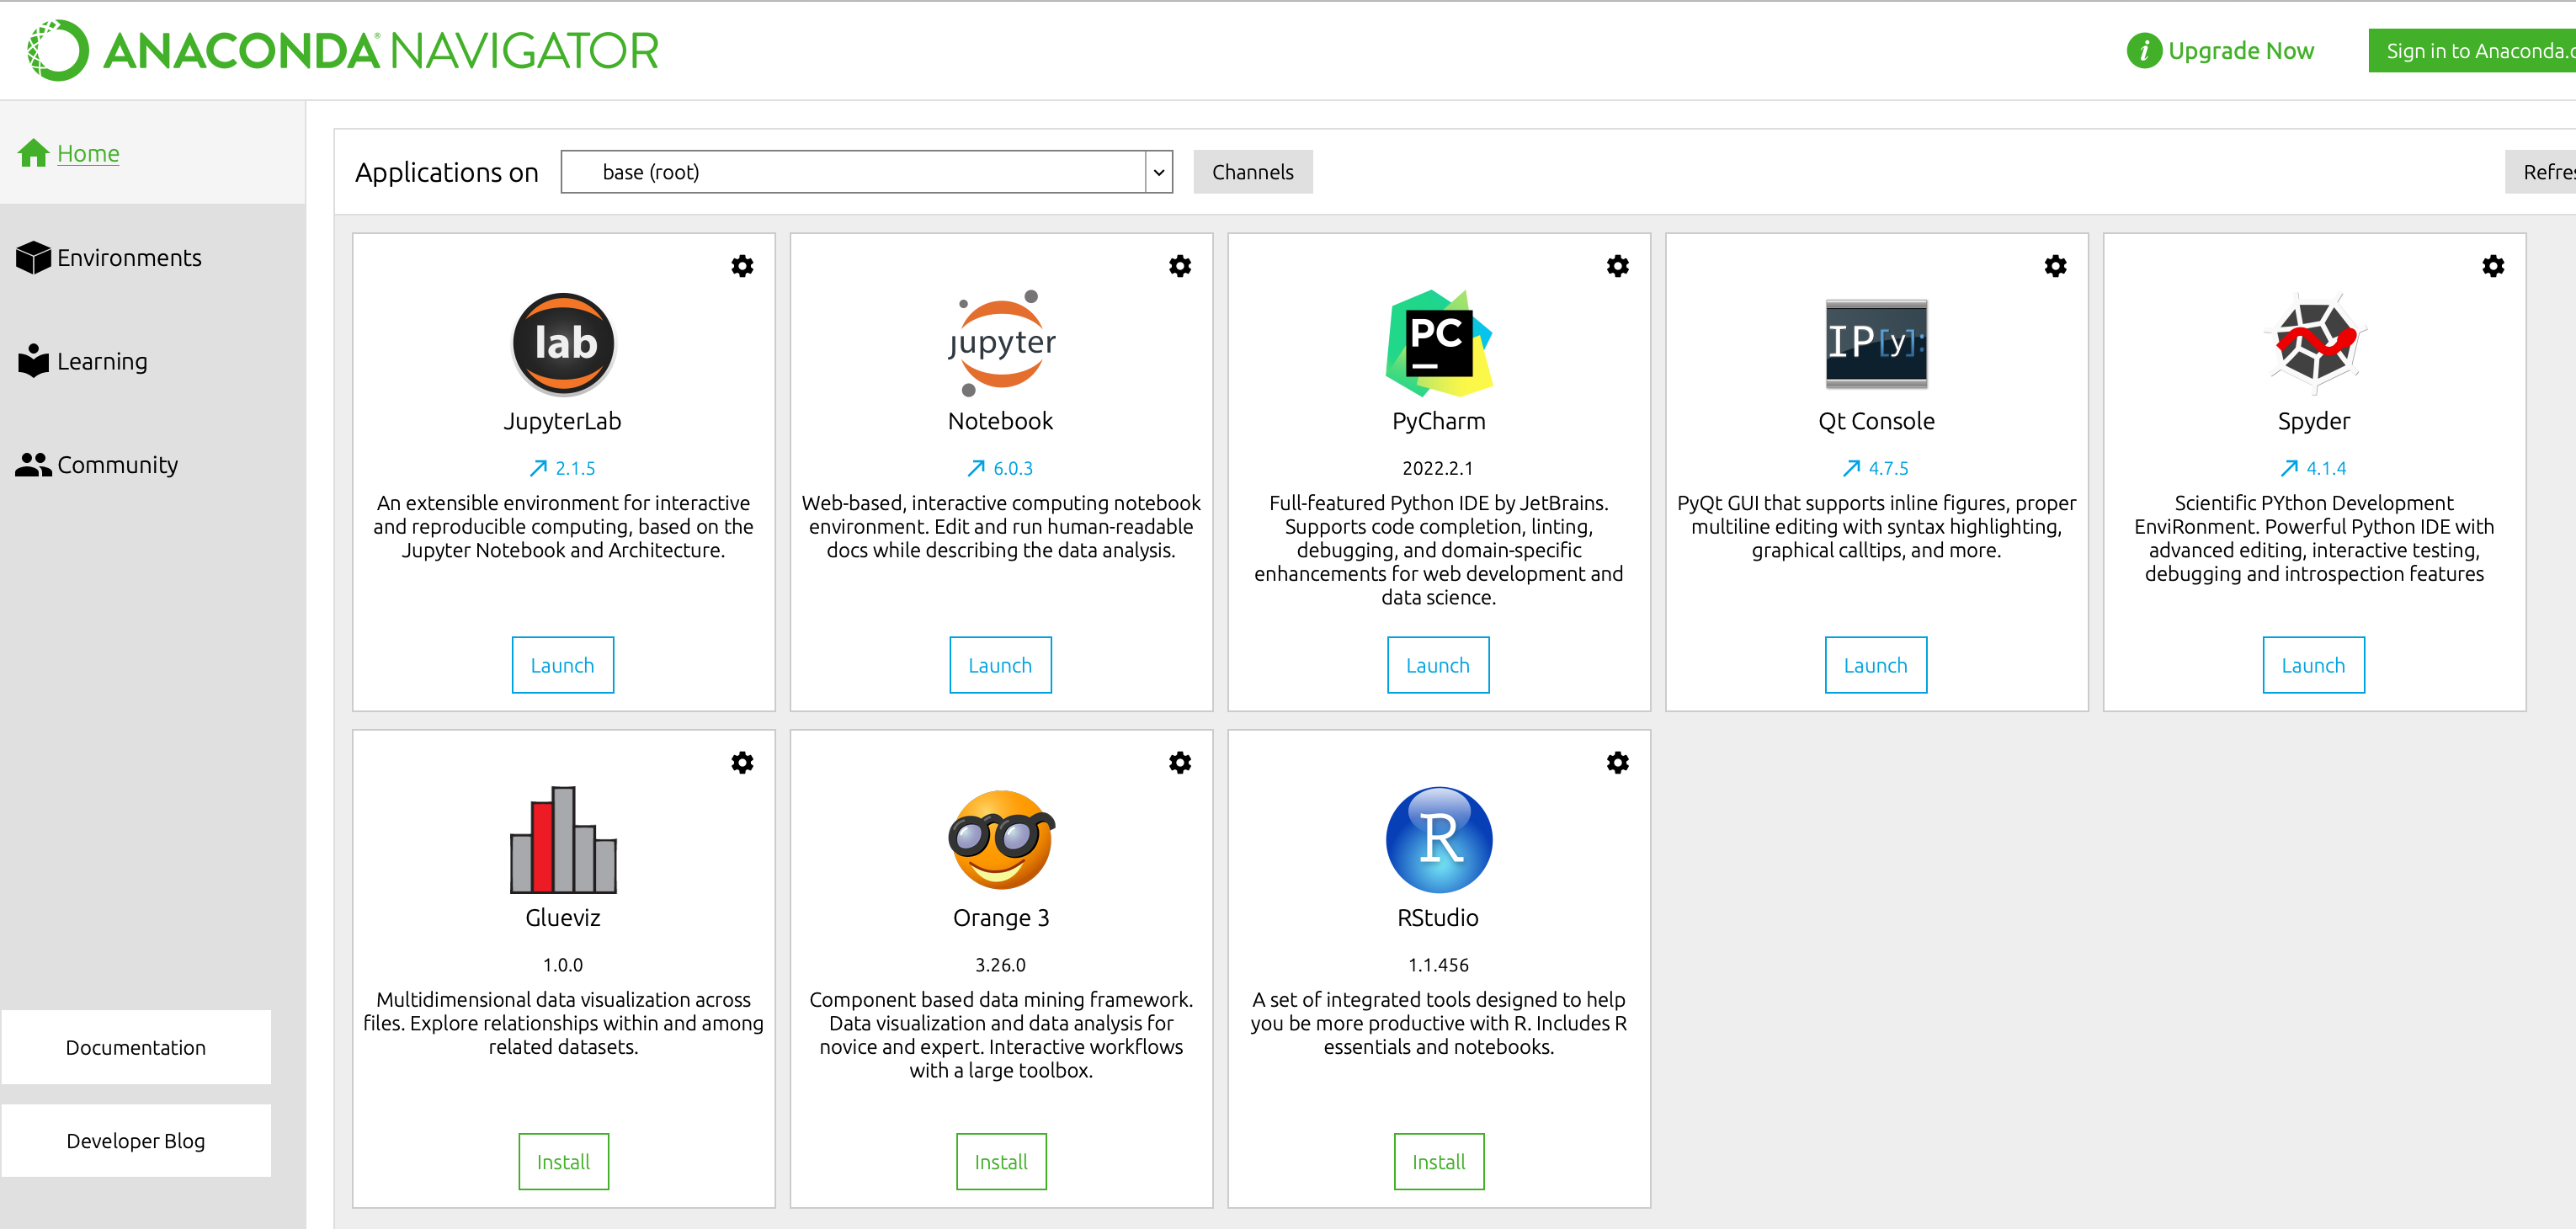
Click the Launch icon under the
Jupyter Notebooktile. This should open up a browser window or tab with your full set of directories/files
Terminal way:
Navigate to folder where you want to create a new or open an existing notebook
Type
jupyter notebookinto your terminal (Mac) or terminal emulator (Windows)

As instructed by the terminal output, copy the provided link and paste into a web browser
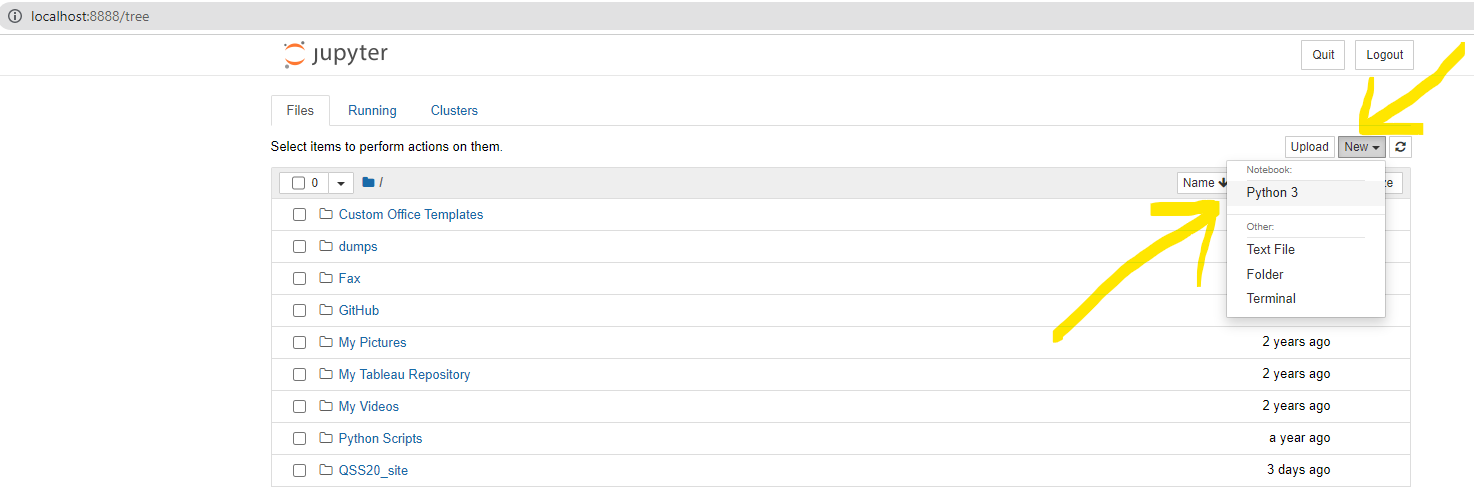
Either way, you can then create or open a notebook: To create a new notebook, click New in right hand corner. If opening an existing notebook, navigate to folder where it’s stored, click on the file, and notebook should open in a new browser tab
If you run into issues on Window, check out this StackOverflow post
Text editor#
Using a text editor tailored to programming is really helpful when writing code that takes longer to run, as it is visually appealing and highlights parts of the syntax (e.g., the start of a function) to more easily catch mistakes. An overall workflow for this might be:
Write and test the code on a small sample of data in a Jupyter notebook or integrated development environment (IDE).
Translate the code into a
.pyor.Rscript that can be run all at once (without having to execute each cell)
For step two, the code can be opened in any basic text editor that comes standard on your machine (e.g., text editor on Macs, Notepad on Windows), but a more visually appealing text editor makes the process smoother and more enjoyable.
I suggest Sublime Text, but there are many other options (e.g., Atom, Nano, AquaMacs).
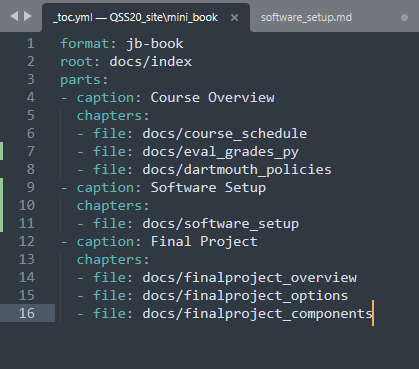
Text editors are also good for working with .yaml files, which can be used to store things like passwords/credentials to access APIs. Here’s an example of Sublime Text and a .yaml file that has the table of contents for this QSS20 course website:
Note: An IDE (mentioned above) is a comprehensive set of tools for software development, often including a text editor, command line, and file browser in a single interface. Examples of IDEs compatible with Python include PyCharm, Spyder, and Visual Studio Code. IDEs are useful but sometimes buggy when working with Jupyter notebooks (.ipynb), so for this course please set up a command line and jupyter notebook as described in lecture.
Git/GitHub#
We’ll go over more Git/GitHub instructions during class. Before then:
Install Git if you haven’t already
Create a free GitHub account if you don’t have one already
If you try running git clone to copy over a repository and get an error like xcrun: error: invalid active developer path, you can find instructions for a fix in this StackOverflow post.
How to access Jhub#
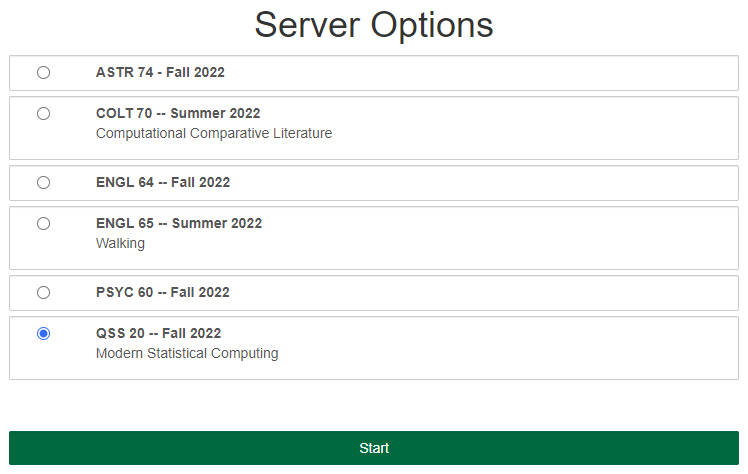
Navigate to: jhub.dartmouth.edu while logged in with your Dartmouth netid. If you’re off-campus, you may need to connect to Dartmouth VPN (instructions here; feel free and email Dartmouth IT about issues). You should see an option on Jhub for our course. Click on it and the server will start up in a minute or two.
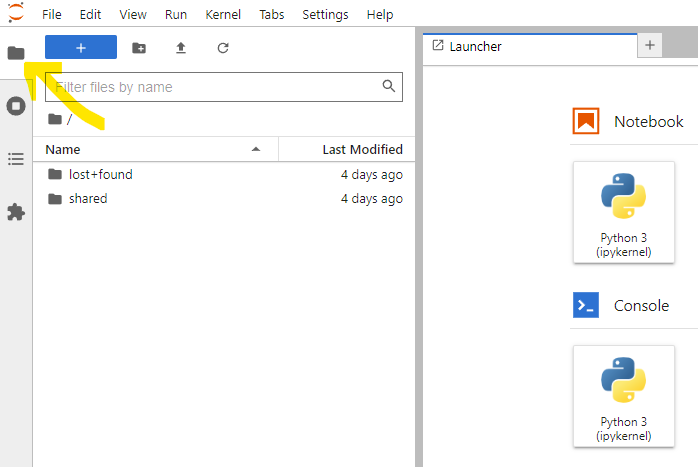
Navigate to your home directory–which belongs only to you–by clicking the folder icon at the top left. Then click the blue plus icon to create and name a new folder (you could call it
QSS20_classwork/) in which to store your work for this class:
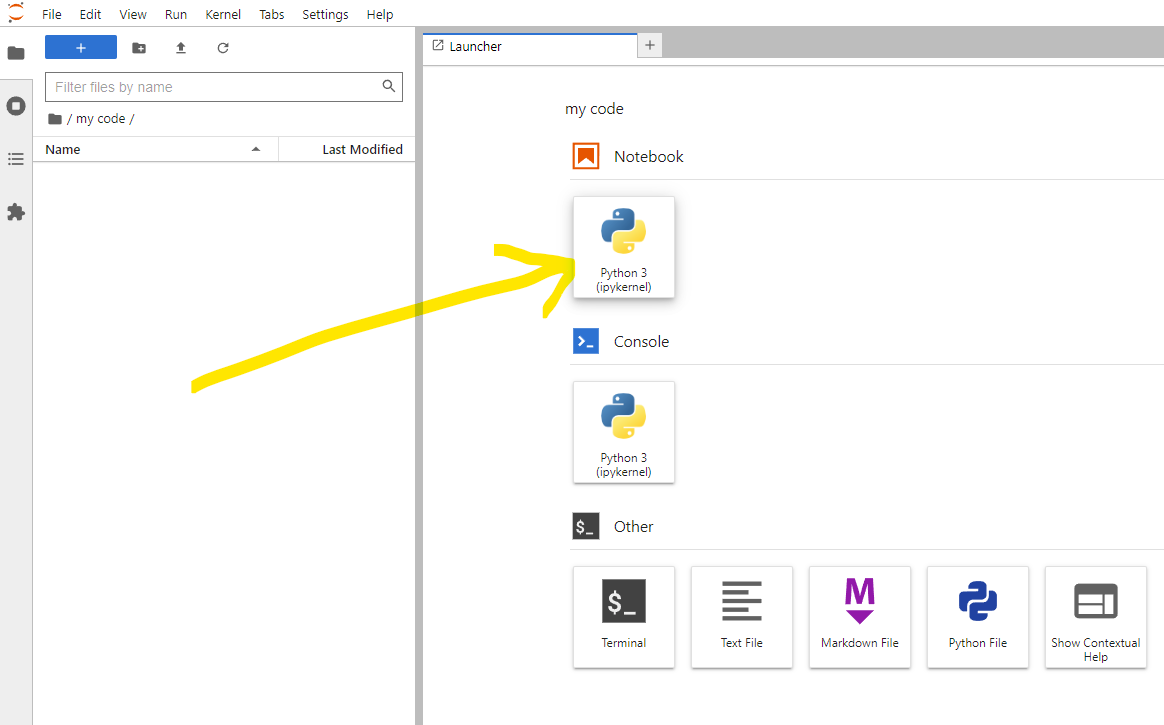
To start a new python3 notebook/kernel from scratch, click the
Python 3icon in the top left of the launcher window (right portion of the screen). Make sure to give it a name (or you’ll get crowded by mysterious files called “Untitled.pynb”!):
If interfacing with GitHub from Jhub, open a terminal by clicking the
Terminalicon in that same launcher menu to make a terminal that works with syntax similar to your local one:
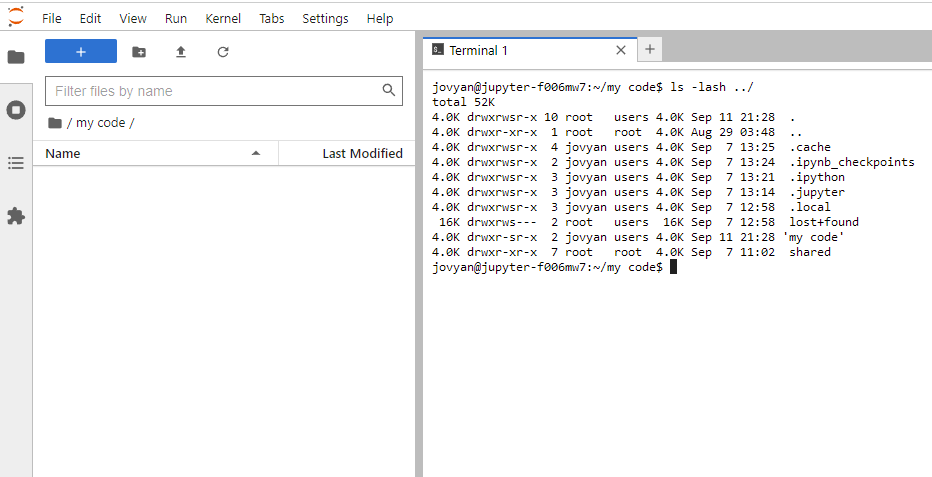
We’re going to focus on interfacing with GitHub from your local computer, so don’t worry too much about the remote terminal for now.
Storing your work on Jhub#
You can access the common class content (e.g., slides and blank jupyter notebooks for activities) in the write-protected folder /shared/QSS20, but you cannot save any edits to these files. Instead, copy each blank notebook (e.g., 00_introclass.ipynb) into your classwork folder you created inside your home directory. Your changes to anything in this folder will persist throughout the quarter, and you can also download them to submit for psets and the like. You can create whatever directory structure and files you want there without it interfering the the common class content in /shared/QSS20, which (again) you can’t save changes to and therefore can’t download.
QSS20 repository content on Jhub#
Course content like slides or activities should automatically populate this directory on Jhub: shared/QSS20/. However, to get the latest content added to course repo (anything added/changed since the last user started a new server), you might need to restart your server as follows:
Click the “File” button from the top menu bar
Click “Hub Control Panel”
Click “Stop My Server”
Then click “Start My Server”
Terminal/terminal emulator#
We’ll be reviewing basic “command line” syntax, which is important for:
Interacting with Git: while there are ways to interact with Git through the online user interface (GitHub), Git’s full functionality depends on being able to interact with repositories (basically, folders that store code) through the command line.
Executing .py or .R scripts that take a long time to finish executing: ideally, you should write code that is efficient (runs quickly). But sometimes, regardless of how efficient the code is, things take a long time to run given the limited resources of your laptop or local environment. Executing code on the command line requires telling your computer to run a script and sometimes feeding that script arguments to parse. This is easier to leave in the background and less prone to error than is running time-consuming/at-scale code from a Jupyter notebook.
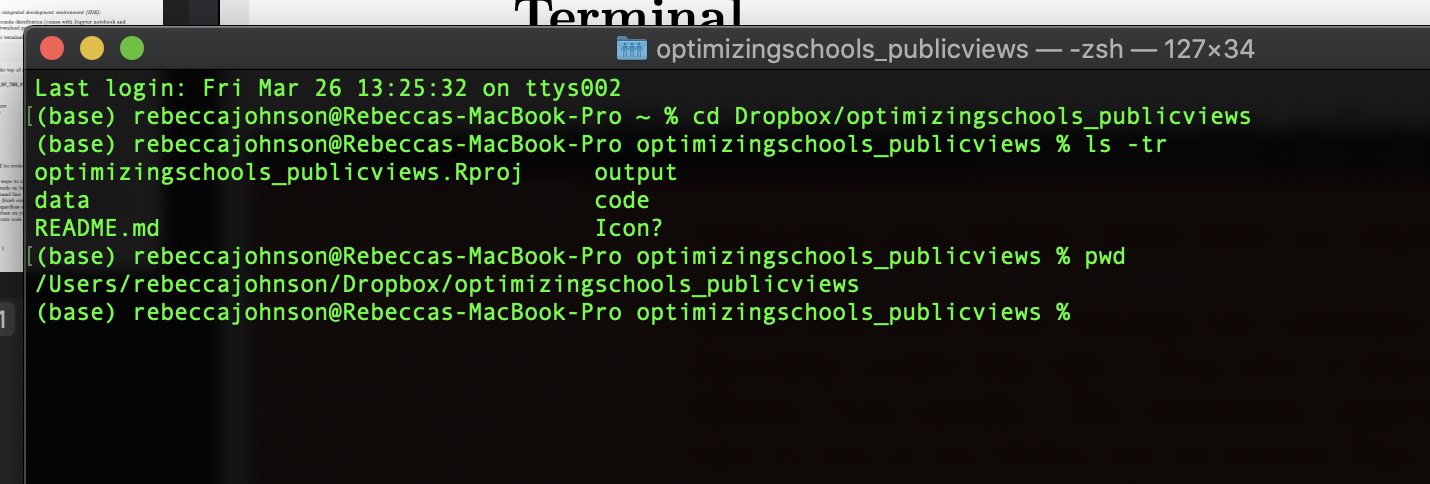
Mac/OSX#
Macs have a built-in terminal (to access, go to: 1. Search -> 2. Terminal). Below’s an example of what one looks like, with commands to move to a folder called Dropbox/optimizingschools_publicviews and then view folder contents:
I recommend also using a terminal manager to start long-running processes, detach from them while they are running, and re-attach when they’re done. A good one for Macs is called screen, but tmux also works well (I prefer byobu, which is built on tmux).
Windows#
Windows users have the option of running a native Linux distribution inside traditional windows to access a UNIX-style command line. This is called the Windows Subsystem for Linux and is the option I suggest. It lets you interact with files and programs through a UNIX command line rather than the usual method of clicking through folders. Feel free to also check out “terminal emulators” such as cygwin.